On this page
Last updated: December 08, 2022.
ZenML 0.23.0 was released this week and comes bundled with a brand new neptune experiment tracker flavor. Neptune is a popular platform that you would normally use in the iterative ML experimentation phase to track and visualize experiment results. Neptune can also track and visualize the results produced by your ZenML pipeline runs, as you make the transition towards a more production oriented workflow.
A big shout-out to @AleksanderWWW, from the Neptune team who spearheaded the Neptune integration with #1082.
We showcased this integration in our weekly community meetup.
🧲 How Neptune fits with ZenML
One of the coolest things about Neptune is how focused it is on what it does well: Being a kick-ass experiment tracker and model registry. Given ZenML does not have a model registry abstraction (yet), we decided to focus on the experiment tracking part this time around, with the ZenML experiment tracker abstraction.
ZenML’s experiment trackers let you track your ML experiments by logging information about your models, datasets, metrics, and other parameters. You can also browse, visualize, and compare between runs. Every pipeline run is considered an experiment in ZenML, and the Experiment Tracker component facilitates the storage of experiment results, establishing a clear link between pipeline runs and experiments.
🤾 The Challenge
The toughest challenge with the integration was to maintain the state of the Neptune run across the lifetime of a pipeline (i.e. across steps). Aleksander and the Neptune team solved this with the RunProvider class that is a singleton object storing and persisting the Neptune run state across the pipeline.
🪐 Using the Neptune experiment tracker
With this integration, you can easily create a Neptune experiment tracker component and use it in any step in a pipeline.
A concrete example with a pipeline can be viewed in the example on GitHub. The following is a summary to you get started.
🥞 Create a stack with the Neptune experiment tracker
First, let’s create a stack with a Neptune experiment tracker as a stack component.
You’ll need to specify two optional arguments:
- api_token: API key token of your Neptune account. If left blank, Neptune will attempt to retrieve it from your environment variables.
- project: The name of the project where you’re sending the new run, in the form “workspace-name/project-name”. If the project is not specified, Neptune will attempt to retrieve it from your environment variables.
zenml experiment-tracker register neptune_experiment_tracker --flavor=neptune \
    --project=<project_name> --api_token=<token>

zenml stack register neptune_stack \
    -a default \
    -o default \
    -e neptune_experiment_tracker \
    --set
</token></project_name>
🏃 Run a pipeline with the experiment tracker enabled
Next, define a step that uses the experiment tracker component:
from neptune.new.integrations.tensorflow_keras import NeptuneCallback
from zenml.integrations.neptune.experiment_trackers.run_state import (
    get_neptune_run,
)
from zenml.integrations.neptune.flavors import NeptuneExperimentTrackerSettings

settings = NeptuneExperimentTrackerSettings(tags={"keras", "mnist"})

@step(
  experiment_tracker=Client().active_stack.experiment_tracker.name,
  settings={"experiment_tracker.neptune": settings},
)
def tf_trainer(
    params: TrainerParameters,
    x_train: np.ndarray,
    y_train: np.ndarray,
) -> tf.keras.Model:
    """Train a neural net from scratch to recognize MNIST digits return our
    model or the learner"""
    neptune_run = get_neptune_run()  # Getting the run from the integration
    neptune_run["params/lr"] = params.lr

    neptune_cbk = NeptuneCallback(run=neptune_run, base_namespace="metrics")

    model = tf.keras.Sequential(
        [
            tf.keras.layers.Flatten(input_shape=(28, 28)),
            tf.keras.layers.Dense(10),
        ]
    )

    model.compile(
        optimizer=tf.keras.optimizers.Adam(params.lr),
        loss=tf.keras.losses.SparseCategoricalCrossentropy(from_logits=True),
        metrics=["accuracy"],
    )

    model.fit(
        x_train,
        y_train,
        epochs=params.epochs,
        batch_size=64,
        callbacks=[neptune_cbk],
    )

return modelNote: The above code is only for illustration purposes. View the full code here
You can see that using get_neptune_run in the Neptune integration ensures that the user does not need to take care of creating and managing the lifecycle of the Neptune run. Instead, ZenML takes care of the lifecycle of the experiment and the user needs only use the normal Neptune functions as shown with the NeptuneCallback.
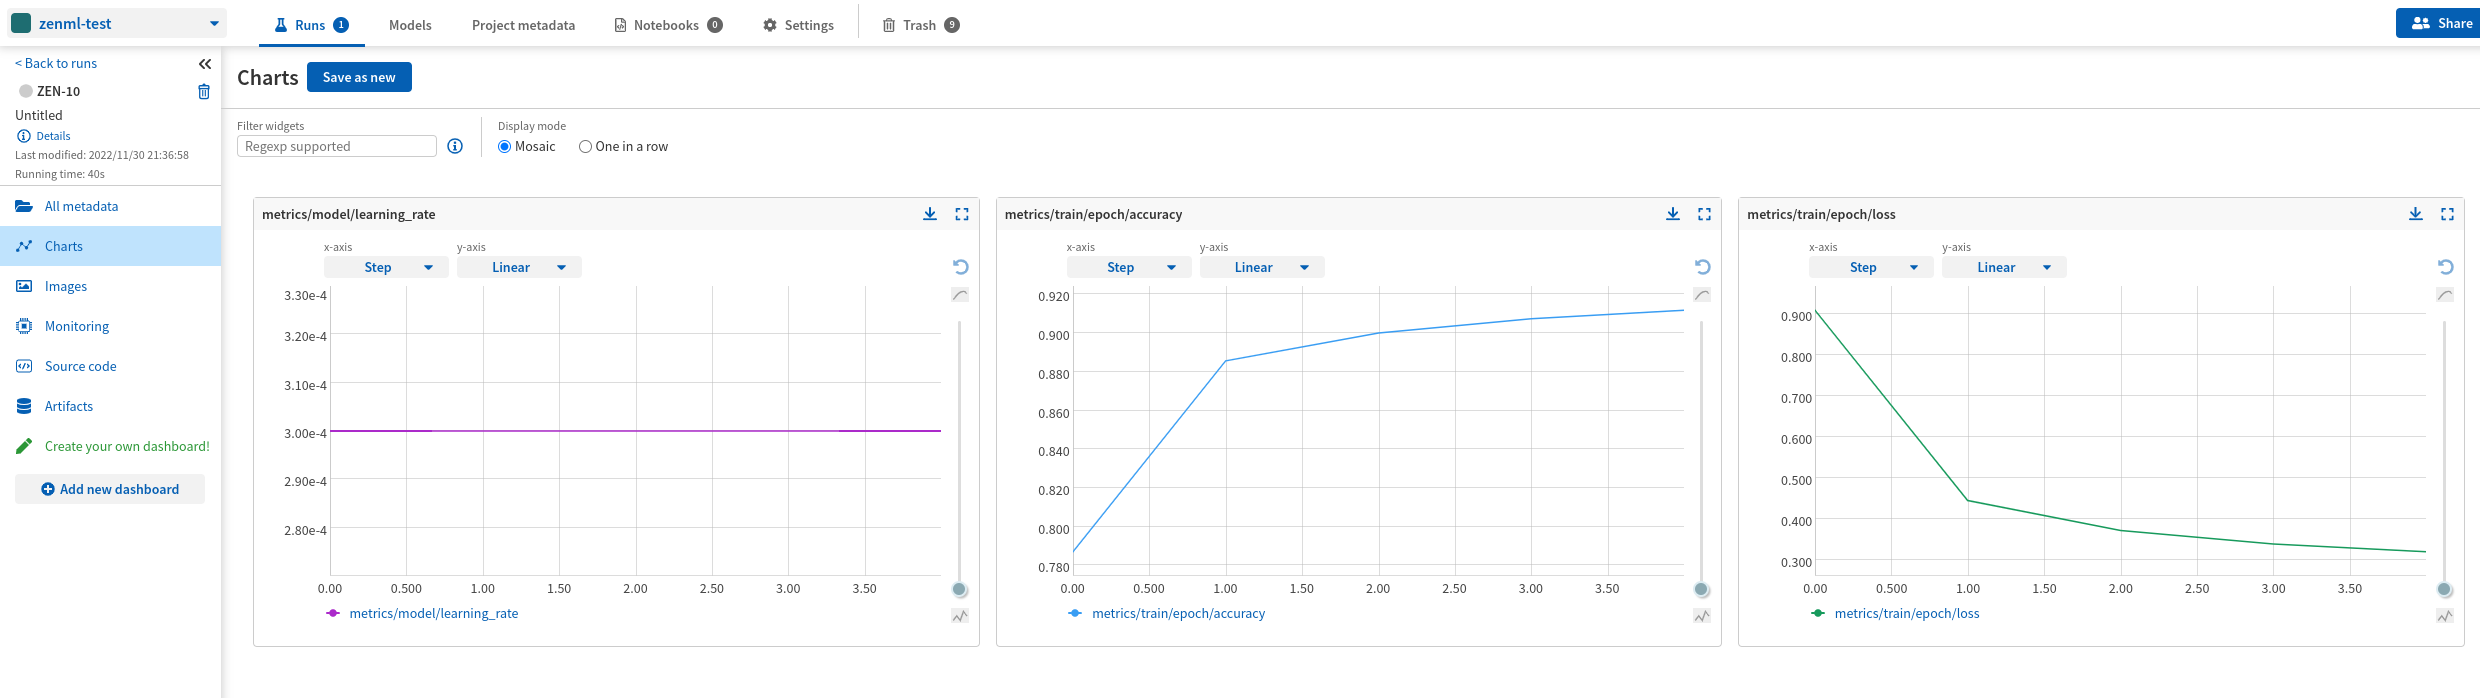
📈 Visualize experiment results in Neptune
Once the experiment is completed, we can view the results in Neptune. In the Neptune UI, we can see the experiment metrics, such as training and validation accuracy, and other custom metrics that we have defined in the ML pipeline.
The results should be available at the URL: https://app.neptune.ai/{ACCOUNT_USERNAME}/{PROJECT_NAME}
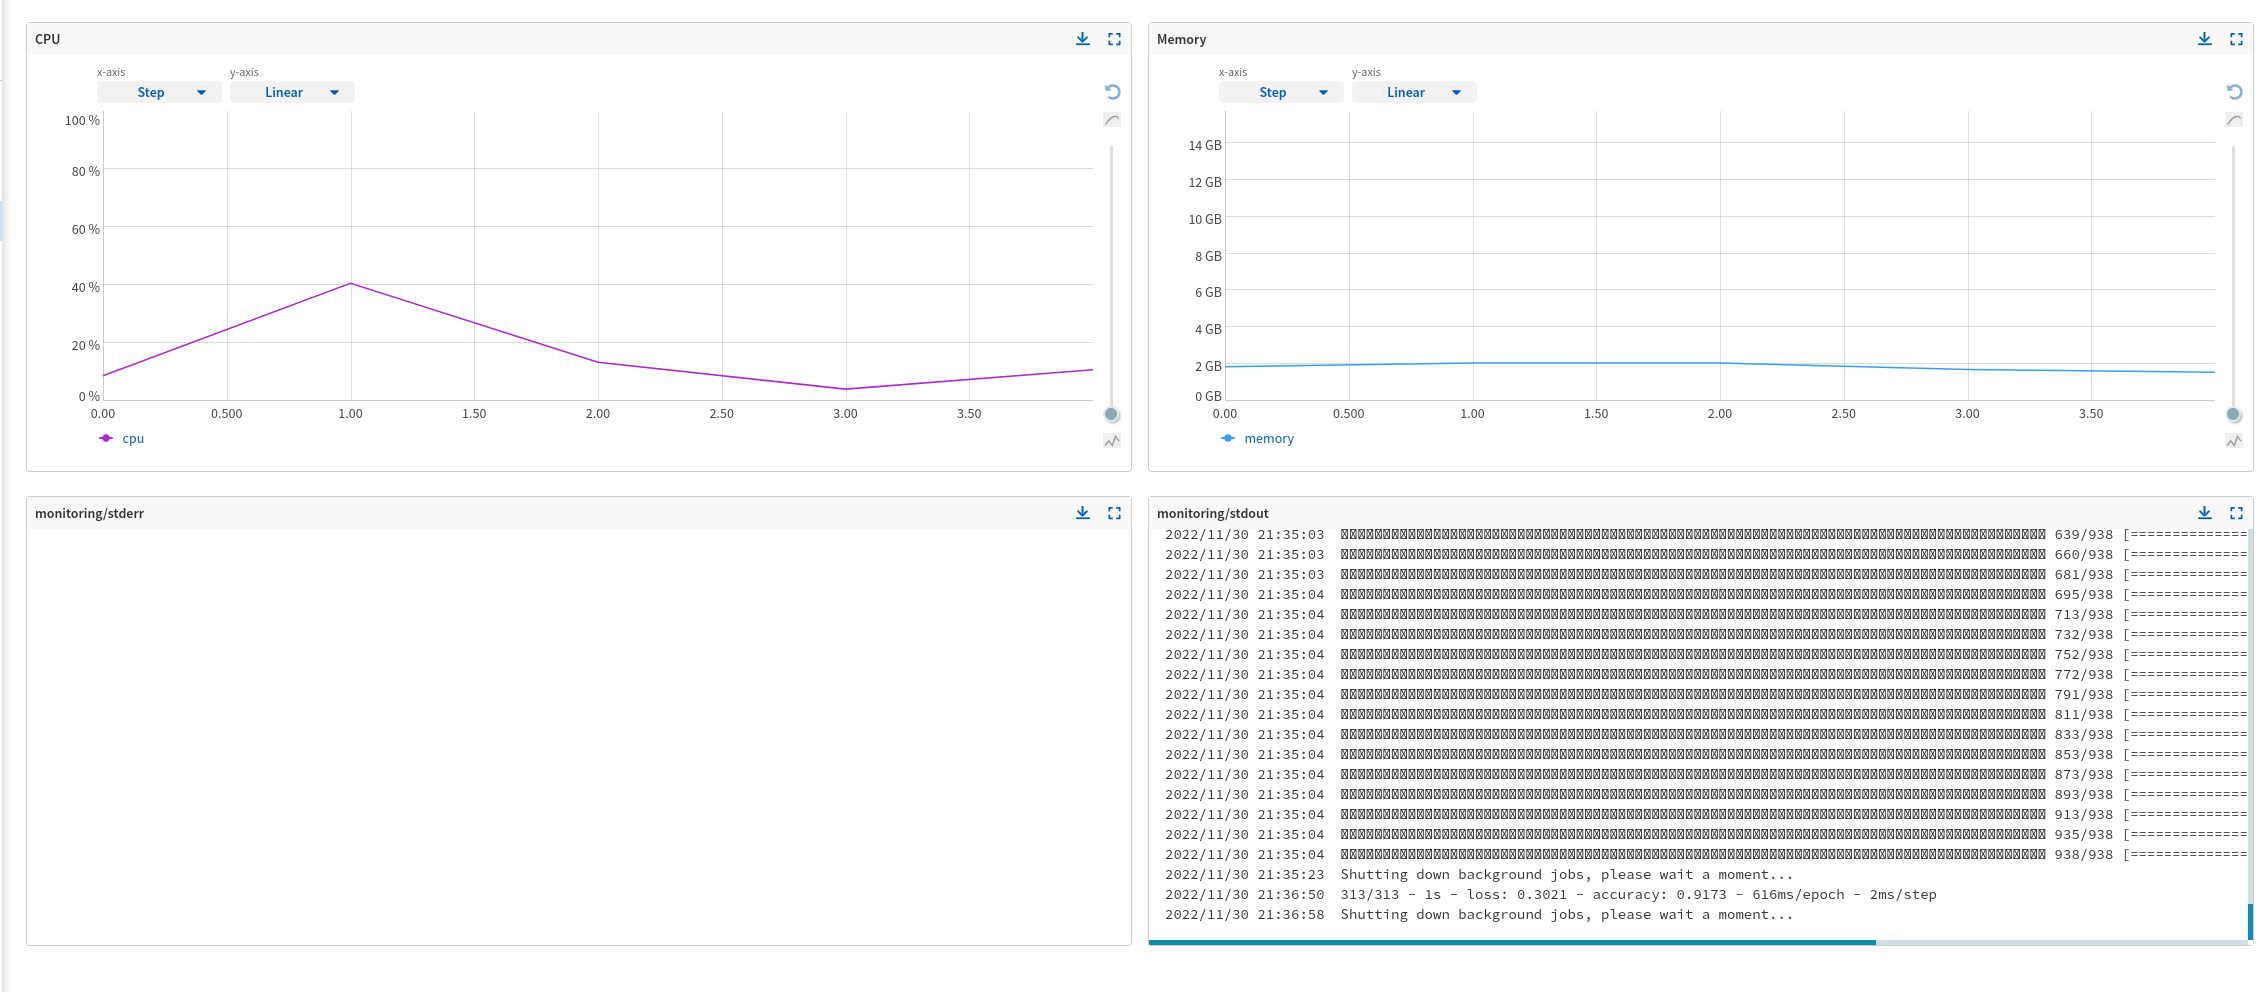
Each pipeline run will be logged as a separate experiment run in Neptune. You can see the results of the pipeline run in the Neptune UI. For example, here’s a screenshot of the Neptune UI showing the experiment run and other relevant details.
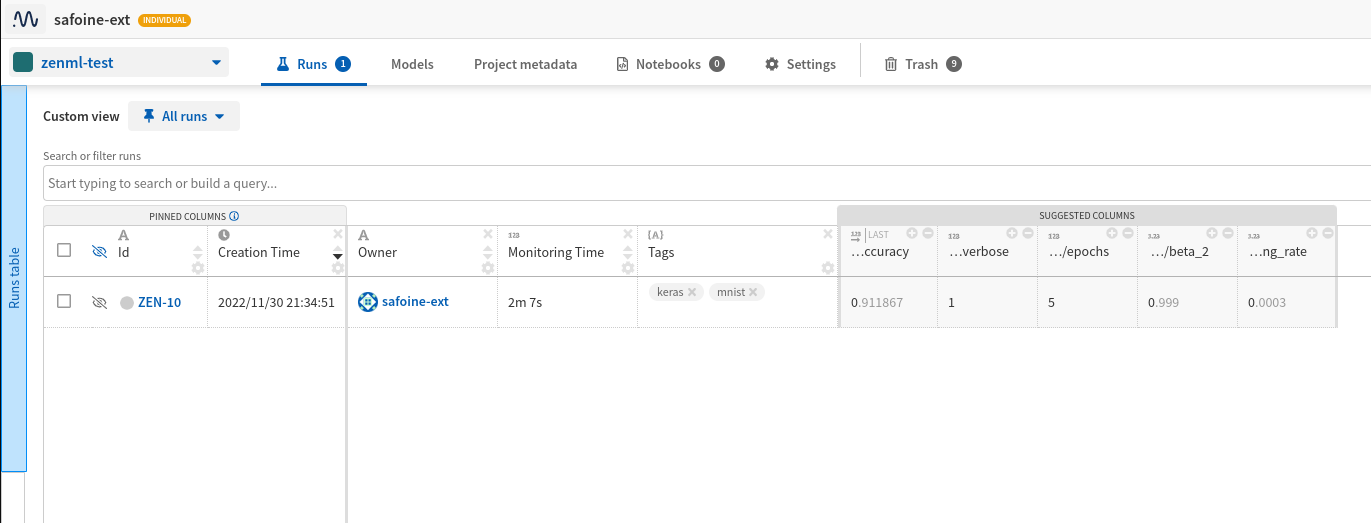
For each run, you should see the following visualizations:
🔥 Onwards and Upwards!
We hope this blog gave an insight into how the Neptune and ZenML team developed this integration together. It’s easy for you to create your own experiment tracker integration as well. Just follow the guide here.
We’d like to also thank the team behind Neptune especially Patrycja Jenkner and Aleksander Wojnarowicz who helped with the integration. Also, check out Neptune’s blog post on the integration here.
If you find any bugs or something doesn’t work the way you expect in the Neptune integration, please let us know in Slack or also feel free to open up a GitHub issue if you prefer. We welcome your feedback and we thank you for your support!