Last updated: November 3, 2022.
The latest ZenML 0.12.0 release extends the model deployment story in ZenML by supporting now KServe additionally to already existing MLFlow and Seldon Core, the new integration will allow users to serve, manage and interact with models within the KServe platform, while it also takes care of preparing PyTorch, TensorFlow, and Scikit-Learn models to the right format that Runtimes servers expect.
This post outlines how to use the KServe integration with ZenML. By the end of this post you’ll learn how to:
- Install the KServe platform on a Kubernetes cluster.
- Setup a production-ready MLOps stack with GCP and ZenML with KServe.
- Create continuous machine learning pipelines that train, evaluate, deploy and run inference on a PyTorch model.
The content of this post was presented during our weekly community meetup. View the recording here.

Why KServe?
KServe (formally KFServing) is a Kubernetes-based model inference platform built for highly-scalable deployment use cases. It provides a standardized inference protocol across ML frameworks while supporting a serverless architecture with autoscaling including Scale to Zero on GPUs. KServe uses a simple and pluggable production serving architecture for production ML serving that includes prediction, pre- and post-processing, monitoring, and explainability. These functionalities and others make KServe one of the most interesting open source tools in the MLOps landscape.
Now let’s see why would you want to use KServe as your ML serving platform:
- You are looking to deploy your model with an advanced Kubernetes-based model inference platform, built for highly scalable use cases.
- You want to handle the lifecycle of the deployed model with no downtime, with automatic scale-up and scale-down capabilities for CPUs and GPUs.
- Looking for out-of-the-box model serving runtimes that are easy to use, or easy to deploy models from the well-known frameworks (e.g. TensorFlow, PyTorch, Scikit-learn, XGBoost, etc..)
- You want more advanced deployment strategies like A/B testing, canary deployments, ensembles, and transformers.
- you want to overcome the model deployment Scalability problems. (Read more about KServe Multi-Model Serving or ModelMesh.
If you think KServe is the right deployment tool for your MLOps stack or you just want to experiment or learn how to deploy models into a Kubernetes cluster without too much configuration, this post is for you.
Requirements
In this example, we will use GCP as our cloud provider of choice and provision a GKE Kubernetes cluster and a GCS bucket to store our ML artifacts. (This could also be done in a similar fashion on any other cloud provider.)
This guide expects the following prerequisites:
- Python installed (version 3.7-3.9)
- Access to a GCP project space
- gcloud CLI installed on your machine and authenticated
Setting Up GCP Resources
Before we can deploy our models in KServe we will need to set up all the required resources and permissions on GCP. This is a one-time effort that you will not need to repeat. Feel free to skip and adjust these steps as you see fit.
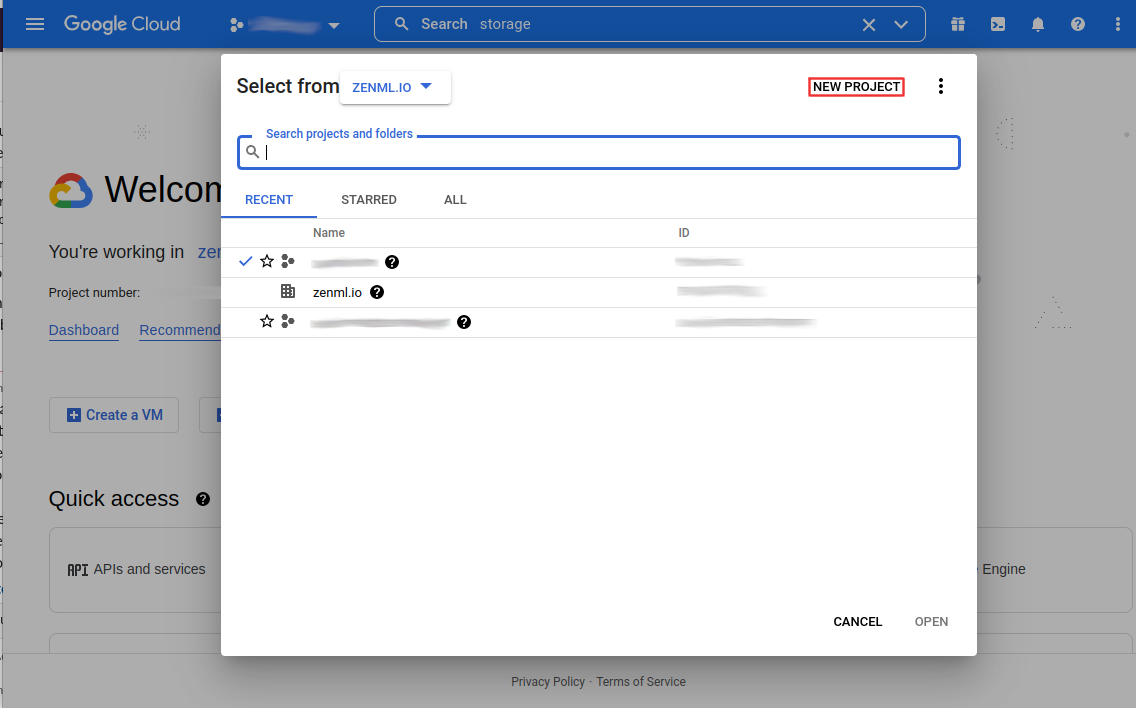
To start we will create a new GCP project for the express purpose of having all our resources encapsulated into one overarching entity.
Click on the project select box

Create a New Project

Give the project a name and click on create. The process may take some time. Once that is done, you will need to enable billing for the project so that you can set up all required resources.
Setting Up GKE
We’ll start off by creating a GKE Standard cluster

Optionally, give the cluster a name, otherwise, leave everything as it is since this cluster is only for demo purposes.

Cloud Storage
Search cloud storage or use this link.

Once the bucket is created, you can find the storage URI as follows:

For the creation of the ZenML Artifact Store you will need the following data:
- gsutil URI
Setting Up Permissions
With all the resources set up, you will now need to set up a service account with all the right permissions. This service account will need to be able to access all the different resources that we have set up so far.
Start by searching for IAM in the search bar or use this link: https://console.cloud.google.com/iam-admin. Here you will need to create a new Service Account.

First off you’ll need to name the service account. Make sure to give it a clear name and description.

This service account will need to have the role of Storage Admin.

Finally, you need to make sure your own account will have the right to run-as this service account. It probably also makes sense to give yourself the right to manage this service account to perform changes later on.

Finally, you can now find your new service account in the IAM tab. You’ll need the Principal when creating your ZenML Model Deployer.

We will have to download the service account key; we are going to use this key to grant KServe access to the (ZenML) artifact store.

We can click on the service account then keys and create a new key and select JSON format.

Setting Up KServe and ZenML Stack
Now that we have everything done on the GCP side, we will jump to how we can install KServe on the GKE cluster and then set up our MLOps stack with ZenML CLI
Installing KServe on GKE
The first thing we need to do is to connect to the GKE cluster. (As mentioned above, this assumes that we have already installed and authenticated with the gcloud CLI.)
We can get the right command to connect to the cluster on the Kubernetes Engine page.

Now we can copy the command and run it from our terminal

- Install Istio:
We need to download istioctl. Install Istio v1.12.1 (required for the latest KServe version):
2.Installing the Knative Serving component:
Install an Istio networking layer:
Verify the installation:
3.Install Cert Manager:
4.Finally, install KServe:
Testing KServe Deployment
To test that the installation is functional, you can use this sample KServe deployment:
- Create a namespace:
2.Create an InferenceService:
3.Check InferenceService status:
4.Determine the ingress IP and ports:
Extract the HOST and PORT where the model server exposes its prediction API:
5.Perform inference
Use curl to send a test prediction API request to the server:
You should see something like this as the prediction response:
Installing ZenML Integrations
First, we need to do is install the integration we will be using to run this demo.
ZenML Artifact Store
The artifact store stores all the artifacts that get passed as inputs and outputs of your pipeline steps. To register our blob storage container:
ZenML Secrets Manager
The secrets manager is used to securely store all your credentials so ZenML can use them to authenticate with other components like your metadata or artifact store.
ZenML Model Deployer
The Model Deployer is the stack component responsible for serving, managing, and interacting with models. For this demo we are going to register KServe Model Deployer flavor:
Registering the Stack
Our stack components are ready to be configured and set as the active stack.
Registering Model Deployer Secret
Our current stack is using GCS as our Artifact Store which means our trained models will be stored in the GS bucket. This means we need to give KServe the right permissions to be able to retrieve the model artifact. To do that we will create a secret using the service account key we created earlier:
Running the Example
The example uses the digits dataset to train a classifier using both TensorFlow and PyTorch. You can find the full example here. We have two pipelines: one responsible for training and deploying the model and the second one responsible for running inference on the deployed model.
The PyTorch Training/Deployment pipeline consists of the following steps:
- importer - Load the MNIST handwritten digits dataset from the TorchVision library
- train - Train a neural network using the training set. The network is defined in the mnist.py file in the PyTorch folder.
- evaluate - Evaluate the model using the test set.
- deployment_trigger - Verify if the newly trained model exceeds the threshold and if so, deploy the model.
- model_deployer - Deploy the trained model to the KServe model server using the TorchServe runtime.
Let’s take a look at the deployment step and see what is required to deploy a PyTorch model:
Deploying any model using the KServe integration requires some parameters such as the model name, how many replicas we want to have of the pod, which KServe predictor (and this is very important because the platform has already a large list of famous ML frameworks that you can use to serve your models with minimum effort) and finally the resource if we want to limit our deployment to specific limits on CPU and GPU.
Because KServe uses TorchServe as the runtime server for deploying PyTorch models we need to provide a model_class path that contains the definition of our neural network architecture and a handler that is responsible for handling the custom pre and post-processing logic. You can read more about how to deploy PyTorch models with TorchServe Runtime Server KServe Pytorch or in the TorchServe Official documentation.
The Inference pipeline consists of the following steps:
- pytorch_inference_processor - Load a digits image from a URL (must be 28x28) and converts it to a byte array.
- prediction_service_loader - Load the prediction service into KServeDeploymentService to perform the inference.
- predictor - Perform inference on the image using the built-in predict function of the prediction service.
Running the example
Wow, we’ve made it past all the setting-up steps, and we’re finally ready to run our code. All we have to do is call our Python function from earlier, sit back and wait!
Once that is done we will see that we have two finished running pipelines, with the result of the prediction from the inference pipeline in addition to detailed information about the endpoint of our served model and how we can use it.
Cleaning Up
Cleanup should be fairly straightforward now, so long as you bundled all of these resources into one separate project. Simply navigate to the Cloud Resource Manager and delete your project:

Conclusion
In this tutorial, we learned about KServe and how we can install it on a Kubernetes cluster. We saw how we can setup an MLOps stack with ZenML that uses the KServe Integration to deploy models in a Kubernetes cluster and interact with it using the ZenML CLI.
We also saw how the KServe integration makes the experience of deploying a PyTorch model into KServe much easier, as it handles the packaging and preparing of the different resources that are required by TorchServe.
We are working on making the deployment story more customizable by allowing the user to write their own custom logic to be executed before and after the model gets deployed. This will be a great feature for not only serving the model but that will allow for custom code to be deployed alongside the serving tools.
This demo was presented at our community meetup. Check out the recording here if you’d like to follow a live walkthrough of the steps listed above.
If you have any questions or feedback regarding this tutorial, join our weekly community hour.
If you want to know more about ZenML or see more examples, check out our docs and examples or join our Slack.


.gif)