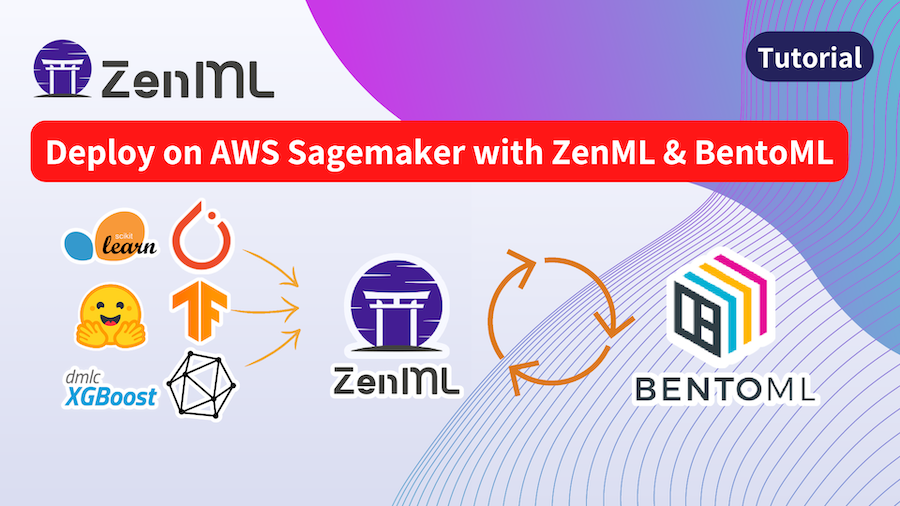
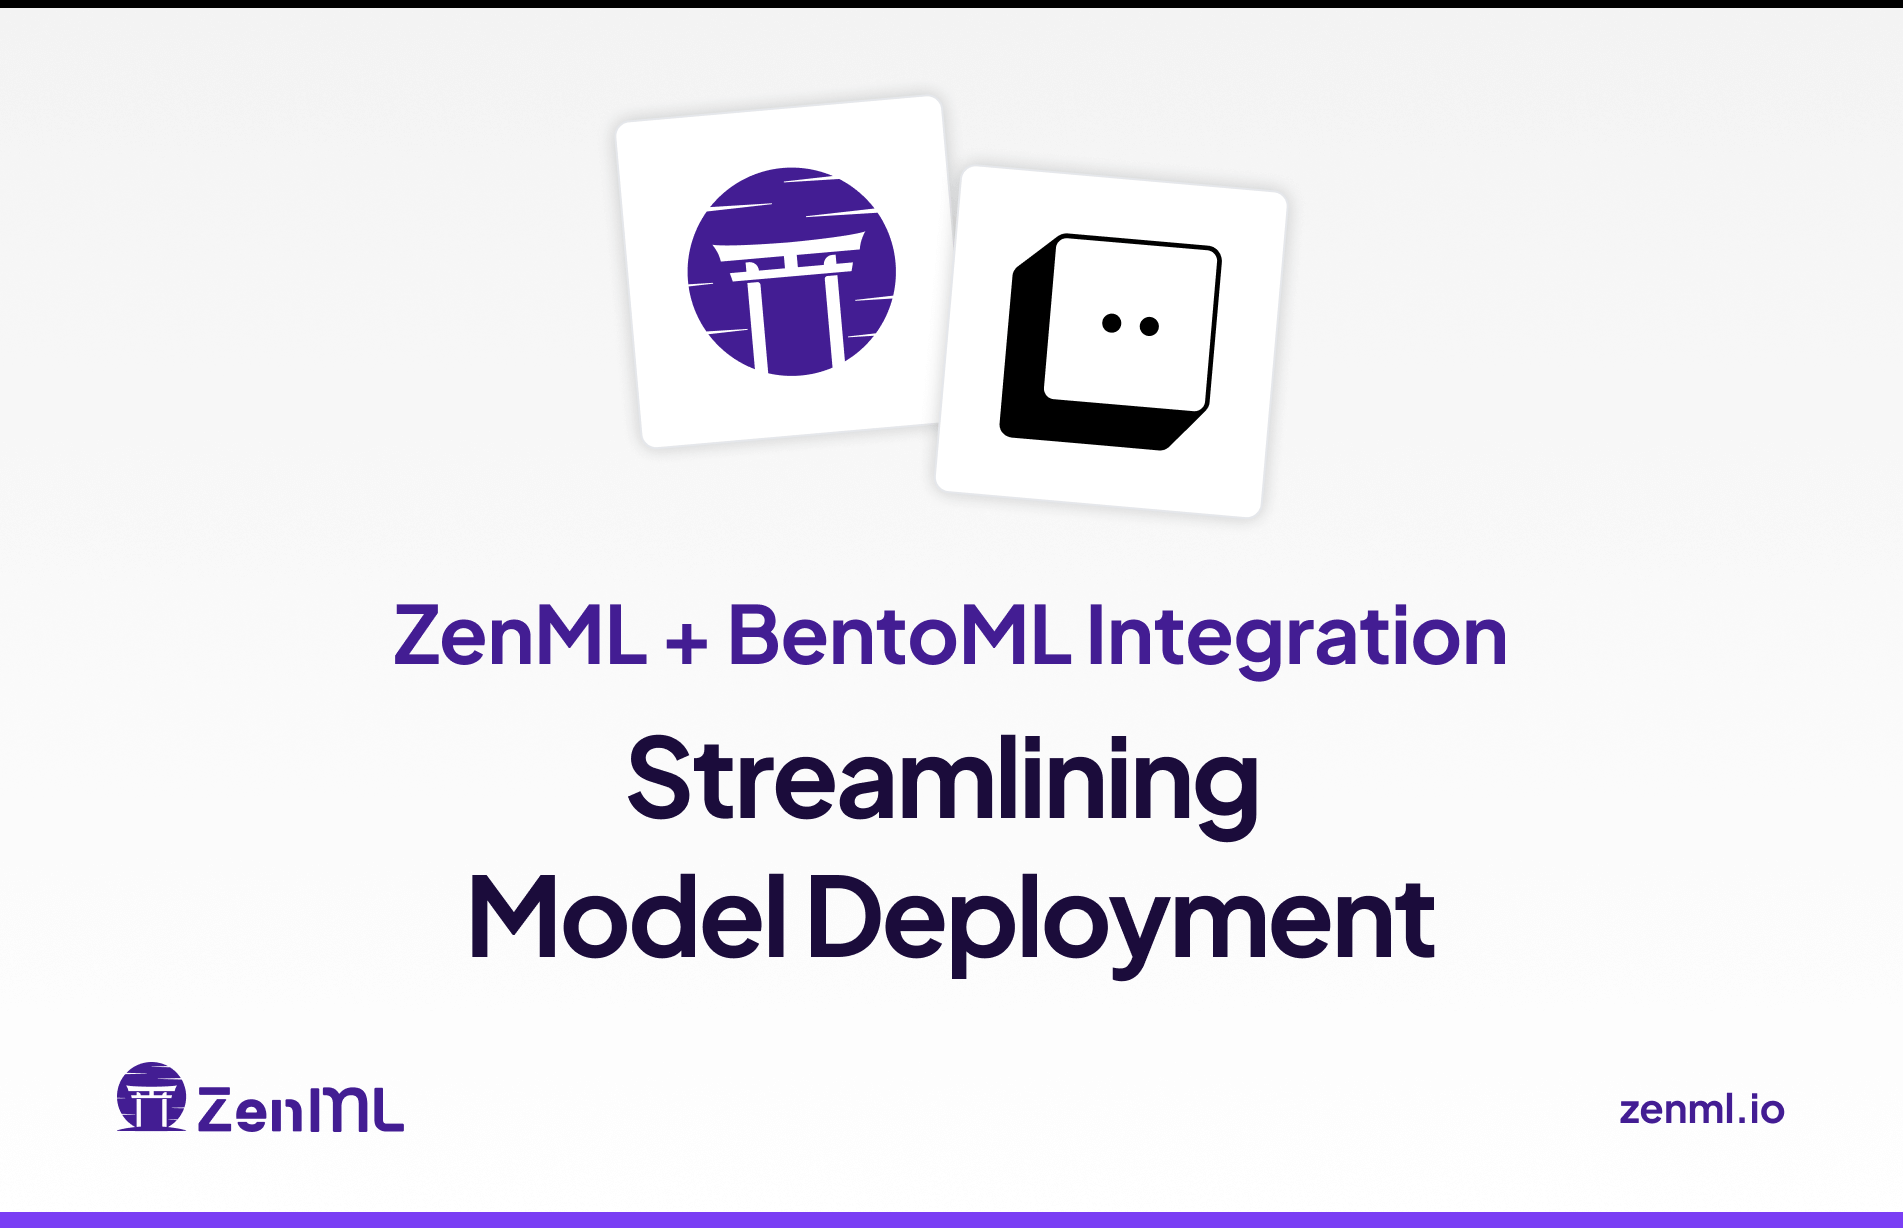
In any machine learning workflow, the ability to efficiently test models locally and deploy them to production environments is crucial. This blog post explores how the integration of ZenML and BentoML creates a powerful synergy that simplifies and streamlines the model deployment process, enabling data scientists and ML engineers to bridge the gap between development and production seamlessly.
We’ll dive into the challenges of model deployment, introduce the key features of ZenML and BentoML, and demonstrate how their integration can revolutionize your MLOps workflow. Whether you’re a seasoned ML practitioner or just starting your journey, this guide will provide valuable insights into creating a more efficient and robust model deployment pipeline.
Deploying models is challenging
Developing a high-performing model is only half the battle. The real challenge often lies in deploying these models to production environments where they can deliver value to end-users. Data scientists working on the models shouldn’t have to worry about packaging, versioning, and deploying their models. It helps if you can track your model deployment candidates locally, have them versioned automatically, compare metrics between version and then ultimately deploy the best model to production with ease. This is where ZenML and BentoML can help you!
Enter ZenML and BentoML
ZenML is an extensible, open-source MLOps framework designed to create portable, production-ready machine learning pipelines. It offers a simple, intuitive API that allows you to define your ML workflows as a series of steps, making it easy to manage complex pipelines.
BentoML is an open-source framework for machine learning model serving. It simplifies the process of packaging machine learning models and deploying them as production APIs, supporting various ML frameworks and deployment options.
When combined, these tools allow data scientists and ML engineers to streamline their workflows, focusing on building better models rather than managing deployment infrastructure.
Why Integrate ZenML and BentoML?
At ZenML, we believe in making the ML workflow as simple and intuitive as possible. To this end, we have features like automatic tracking and versioning of data and model artifacts which help you be on top of your development journey. When you pair ZenML with BentoML, you don’t have to worry about packaging and deploying your models. Just define your BentoML service, and ZenML will take care of building and deploying your models with a host of configuration options.
The combination of ZenML and BentoML brings several advantages to the table:
- Simplified Model Packaging: ZenML's built-in BentoML steps make it easy to package trained models into production-ready Bentos.
- Local and Container-based Deployment: Deploy models locally for development and testing, or as containers for more production-like environments
- Automatic Versioning and Tracking: ZenML automatically versions and tracks your Bentos, making it easier to manage different model versions and choose the right one for production.
- Cloud-Ready: Seamlessly deploy Bentos to various cloud platforms using tools like
bentoctloryatai. - Standardized Deployment Workflow: Establish a consistent and reproducible model deployment process across your organization.
- Framework-agnostic Serving: Support for various ML frameworks, allowing you to serve models regardless of the underlying technology.
Getting Started
To leverage the power of ZenML and BentoML in your projects, follow these steps:
Step 1: Installation and Setup
First, make sure you have ZenML installed and the BentoML integration enabled:
pip install zenml
zenml integration install bentoml -y
You will now need to register BentoML as a ZenML Model Deployer. Register the BentoML model deployer with ZenML:
zenml model-deployer register bentoml_deployer --flavor=bentomlAfter creating the model deployer stack component, you can now compose a ZenML Stack with this deployer and other necessary components like an artifact store and orchestrator:
zenml stack register bentoml_stack \
    -d bentoml_deployer \
    -a default \
    -o default
Set it as the active stack so that ZenML knows it should be used for running pipelines:
zenml stack set bentoml_stackStep 2: Create a BentoML Service
Create a service.py file to define your BentoML Service. You can find an example below. This is where you define the logic to be used for serving your models.
- You define a service using the
@bentoml.servicedecorator on your class. Note the class name here as it would be needed later. - You can define APIs for your service. These form the paths that you can call on your service once it is deployed. In this example, we have two APIs,
predict_ndarrayandpredict_image. - Follow the Input and output types guide on the BentoML documentation to learn how to define the types for your APIs and how to use validators on them.
import bentoml
from bentoml.validators import DType, Shape
import numpy as np
import torch

@bentoml.service(
    name=SERVICE_NAME,
)
class MNISTService:
    def __init__(self):
        # load model
        self.model = bentoml.pytorch.load_model(MODEL_NAME)
        self.model.eval()

    @bentoml.api()
    async def predict_ndarray(
        self,
        inp: Annotated[np.ndarray, DType("float32"), Shape((28, 28))]
    ) -> np.ndarray:
        inp = np.expand_dims(inp, (0, 1))
        output_tensor = await self.model(torch.tensor(inp))
        return to_numpy(output_tensor)

    @bentoml.api()
    async def predict_image(self, f: PILImage) -> np.ndarray:
        assert isinstance(f, PILImage)
        arr = np.array(f) / 255.0
        assert arr.shape == (28, 28)
        arr = np.expand_dims(arr, (0, 1)).astype("float32")
        output_tensor = await self.model(torch.tensor(arr))
        return to_numpy(output_tensor)
Step 3: Define Your ZenML Pipeline
Once you have the Service defined, you should now create a ZenML pipeline that trains a model, builds a Bento, and deploys it.
Although ZenML has pre-built steps that you can use for creating a bento, you can also do this by yourself. You can use the bentos.build function from the bentoml library to achieve this and customize the build process as you see fit.
# Build the BentoML bundle. You can use any of the parameters supported by the bentos.build function.
bento = bentos.build(
    service=service,
    models=[model_name],
    version=version,
    labels=labels,
    description=description,
    include=include,
    exclude=exclude,
    python=python,
    docker=docker,
    build_ctx=working_dir or source_utils.get_source_root(),
)
The model_name here should be the name with which your model is saved to BentoML, typically through one of the following commands,
bentoml.MODEL_TYPE.save_model(model_name, model, labels=labels)
# or
bentoml.picklable_model.save_model(
    model_name,
    model,
)
Now, your custom step could look something like this:
from zenml import step

@step
def my_bento_builder(model) -> bento.Bento:
    # Load the model from the model artifact
    model = load_artifact_from_response(model)
    # save to bentoml
    bentoml.pytorch.save_model(model_name, model)

    # Build the BentoML bundle. You can use any of the parameters supported by the bentos.build function.
    bento = bentos.build(
        ...
    )

    return bento
You can learn more about this in our BentoML documentation under the How to use it section.
You can also just use in-built ZenML steps:
bento_builder_step: it builds and packages your model into a bento, which is a format containing all the components - source code, Python packages, as well as model references and configuration - required for running a BentoML Service.bentoml_model_deployer_step: this step takes in your bento and then deploys it either as a local server or in a container with a host of configuration options.
Check out the BentoML ZenML SDK docs for more information on how you can configure these steps.
Your pipeline code can look like the following:
from zenml import pipeline, step
from zenml.integrations.bentoml.steps import bento_builder_step, bentoml_model_deployer_step

@step
def train_model():
    # Your model training code here
    return trained_model

@pipeline
def bentoml_pipeline():
    model = train_model()
    bento = bento_builder_step(
        model=model,
        model_name="pytorch_mnist",
        model_type="pytorch",
        service="service.py:MNISTService",
    )
    bentoml_model_deployer_step(
        bento=bento,
        model_name="pytorch_mnist",
        port=3000,
        deployment_type="container"  # you need to have docker locally for this
    )

# Run the pipeline
bentoml_pipeline()
Make sure that the service parameter in the bento_builder_step has the right file name and the class name that we noted down earlier.
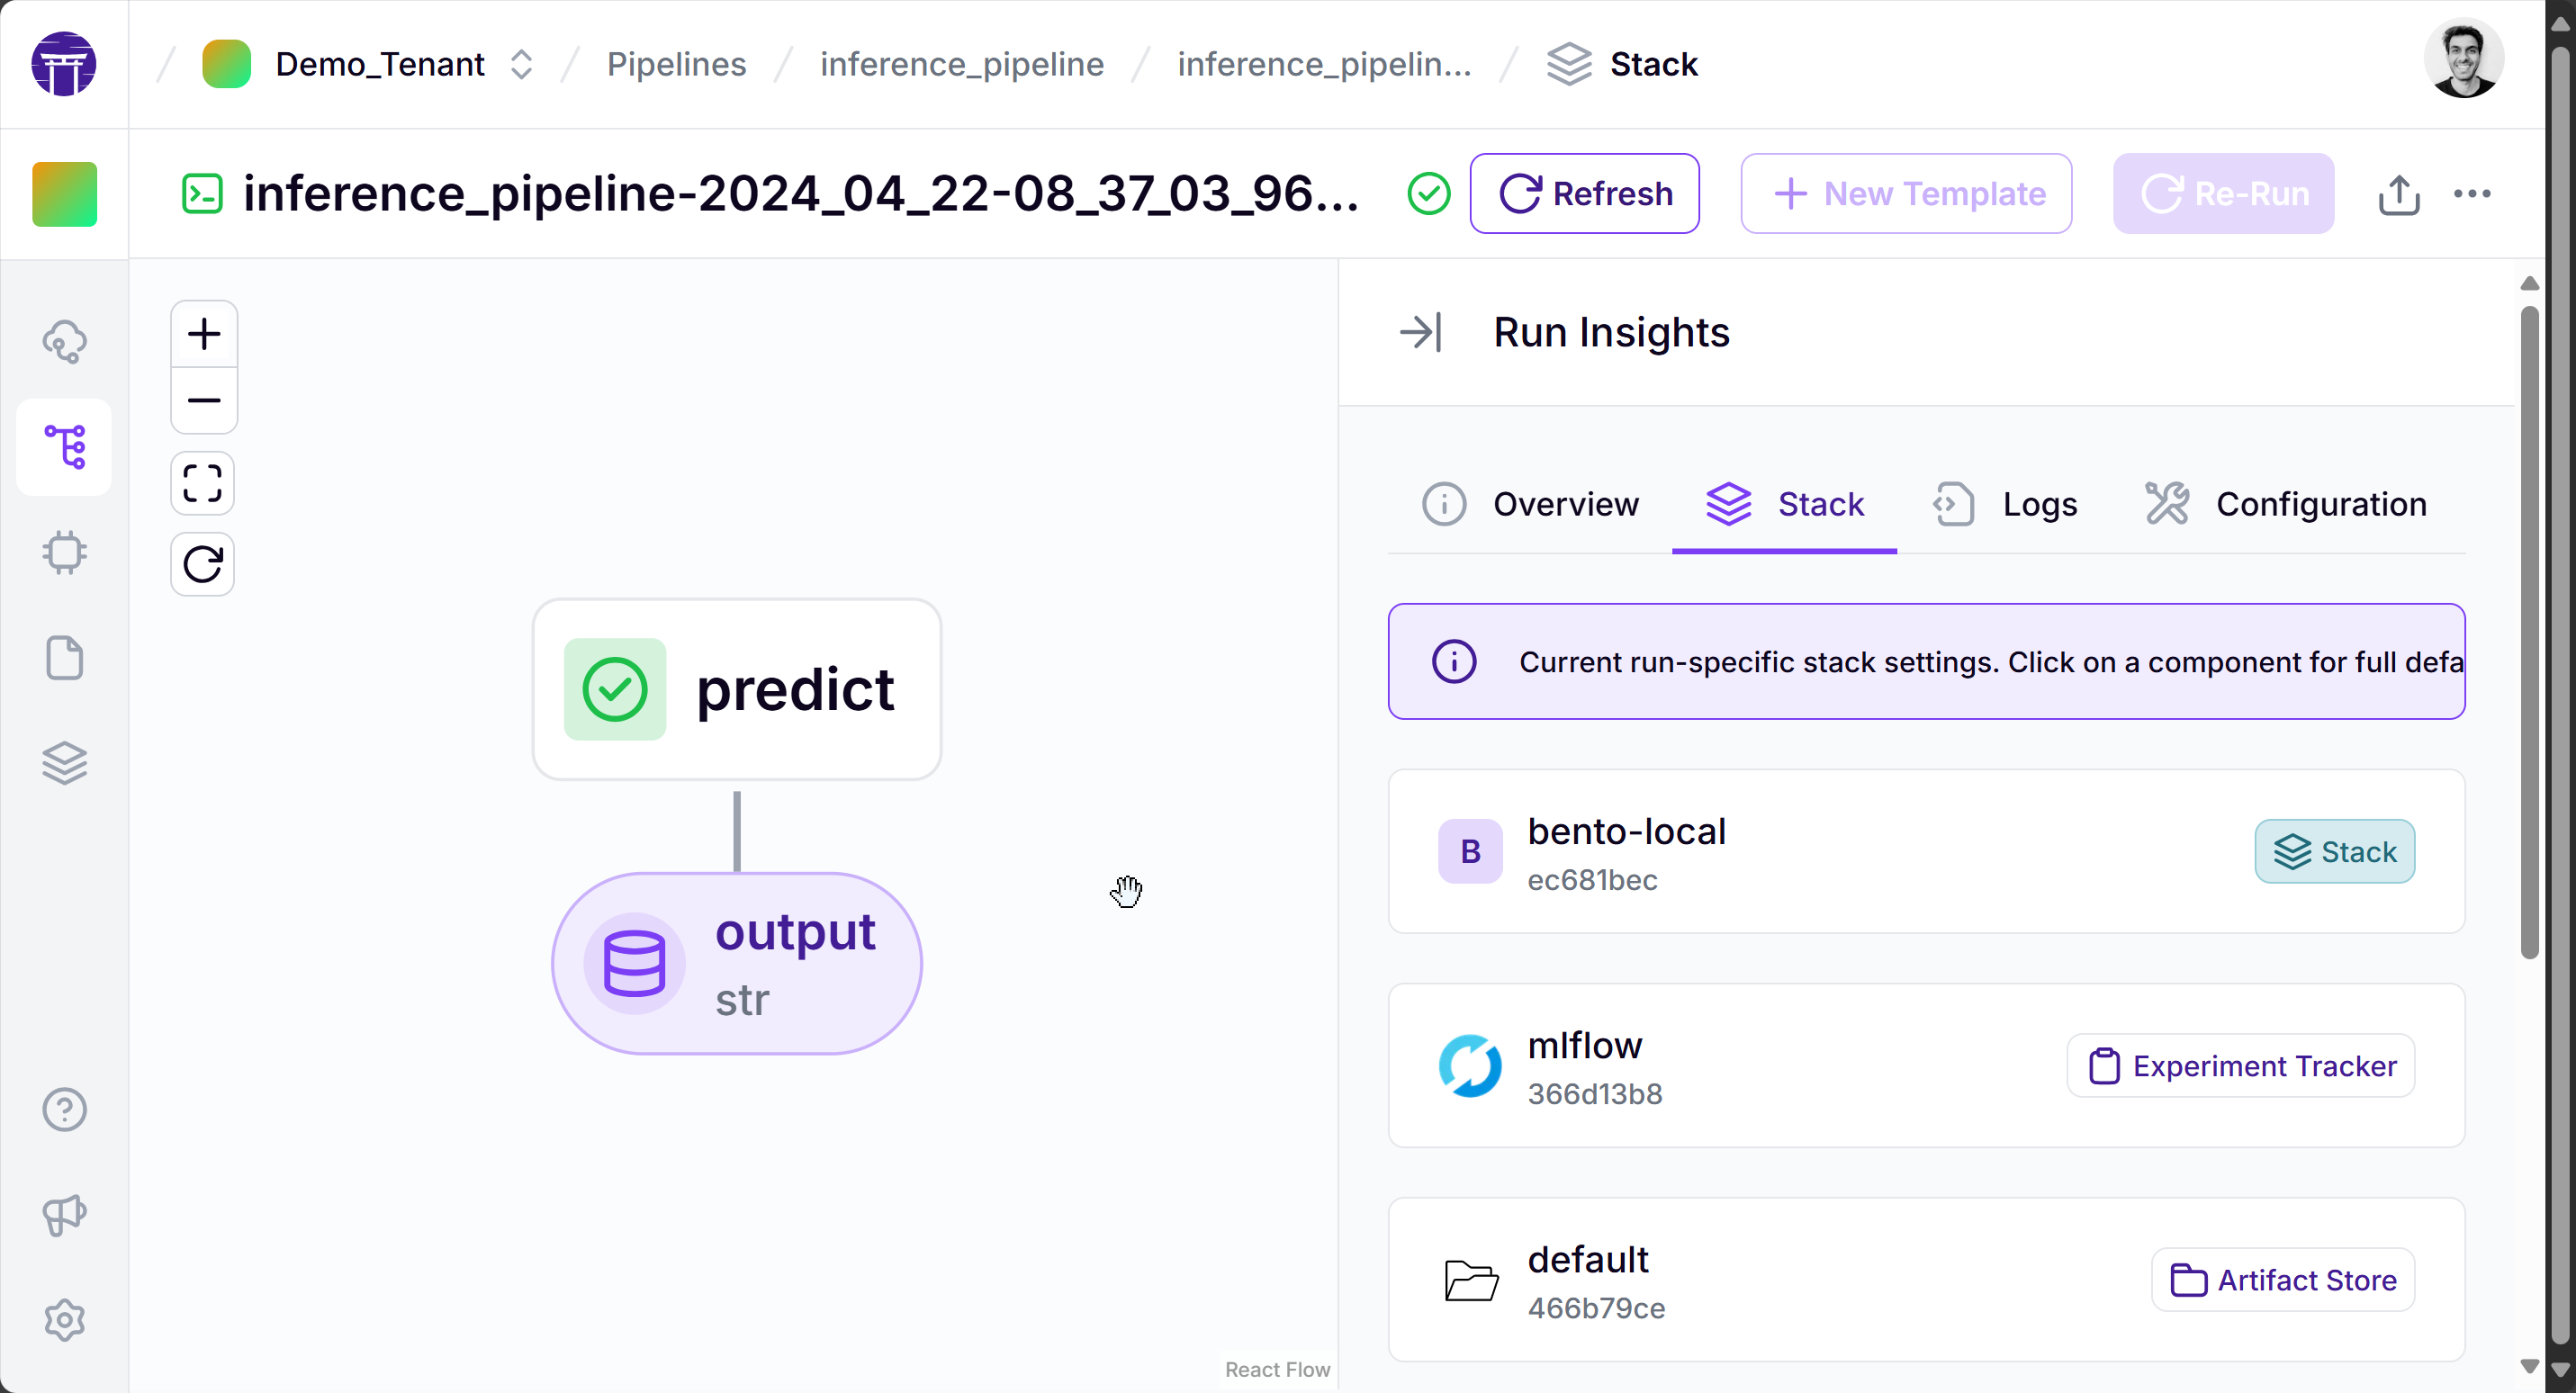
Result: Your ZenML pipelines running with BentoML
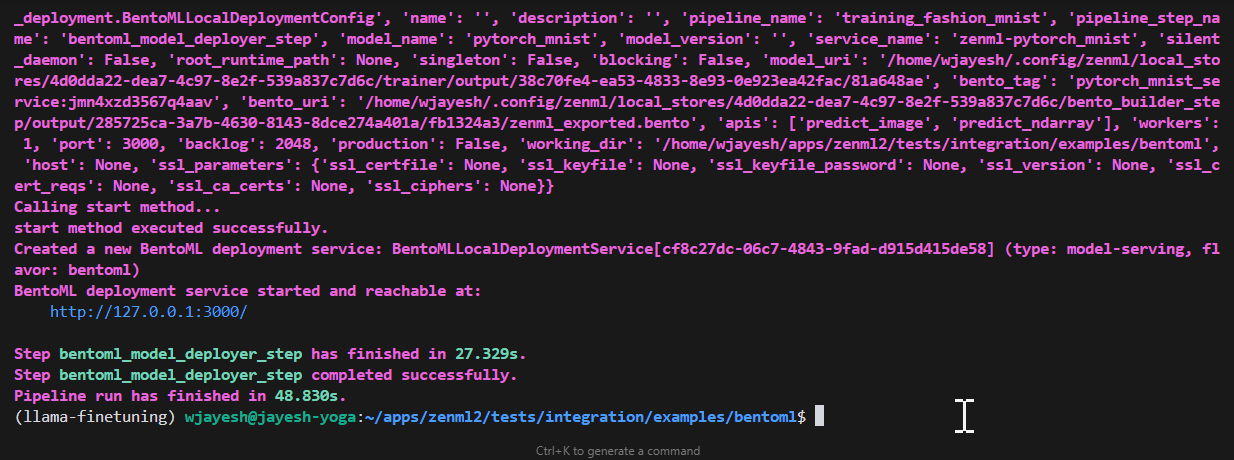
Once set up, your ZenML pipelines will seamlessly integrate with BentoML, allowing for efficient model packaging and deployment. You can watch the pipeline on your ZenML Dashboard and inspect the step logs, metadata and also the outputs.
Accessing Your Deployed Model
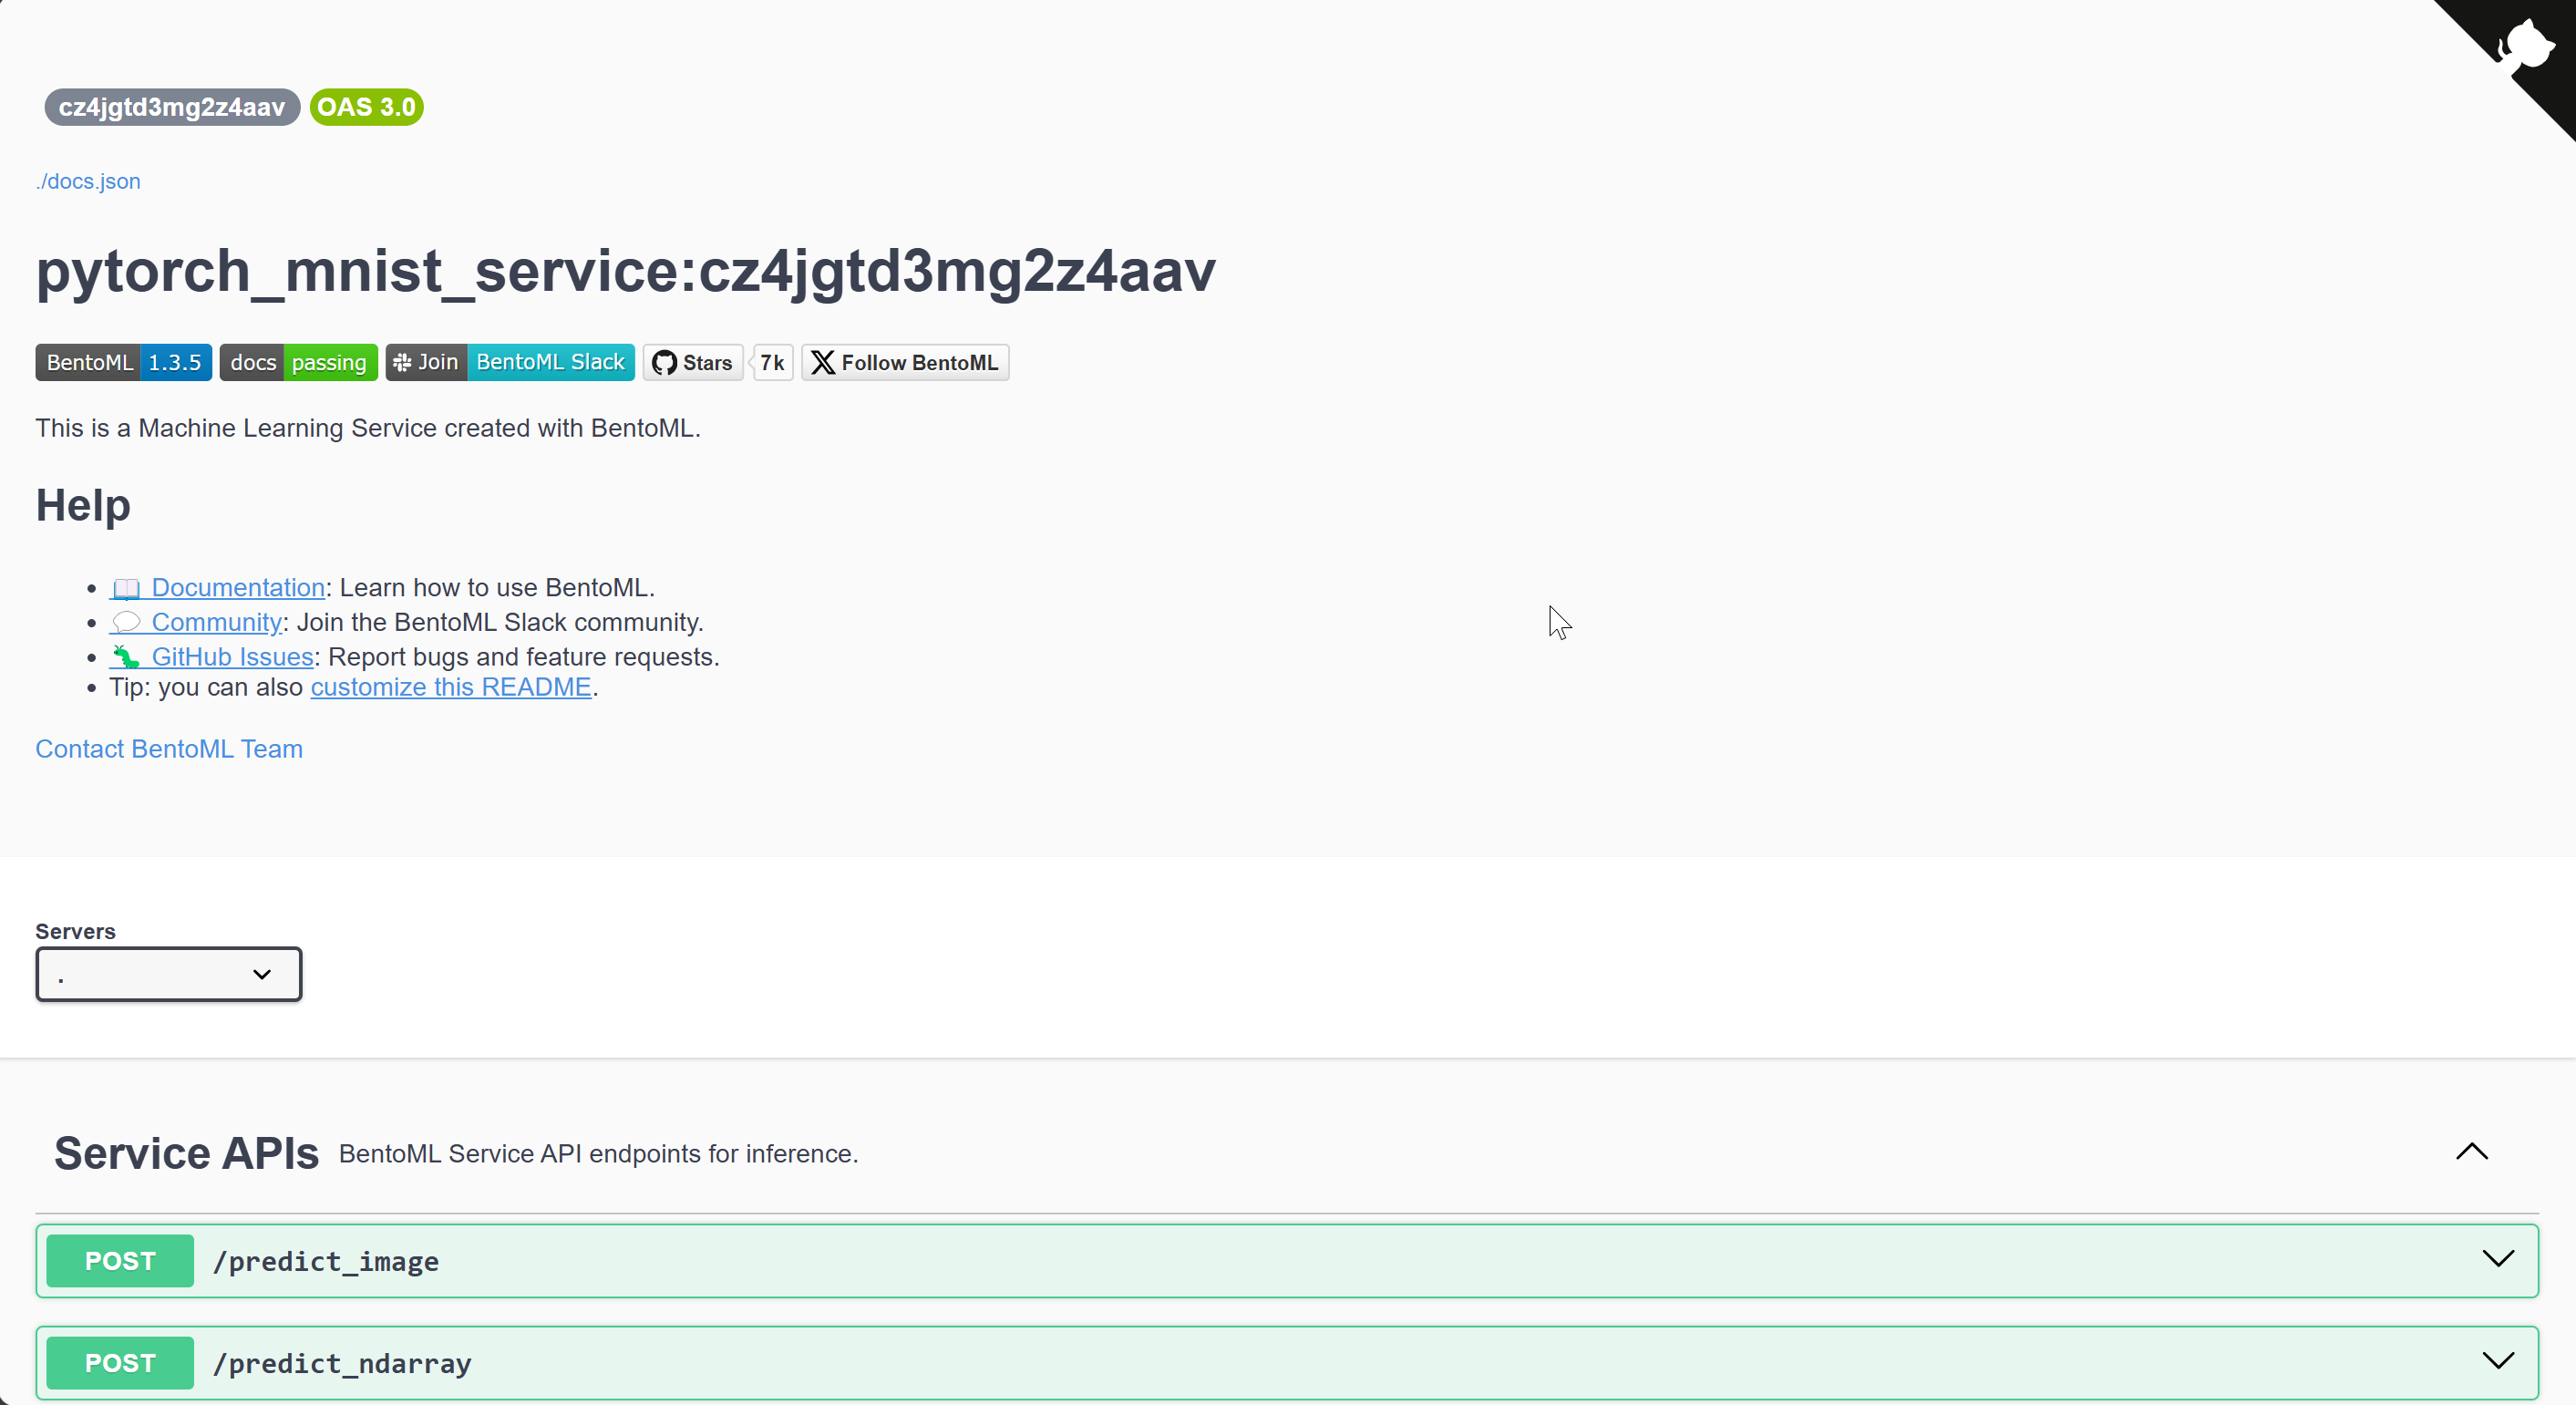
After running the pipeline, you can access your deployed model using the URL of your deployed model. This URL is present in the logs after a successful pipeline run.
This URL will lead you to a docs page where you can find an OpenAPI specification of your BentoML service. You can also try out queries on your defined Service APIs.
You can also use ZenML’s model-deployers CLI to find details about your deployed model like the host and port, among other details like the status of the deployment.
# get the list of all deployed models
zenml model-deployer models list

# describe the model you want
zenml model-deployer models describe <ID>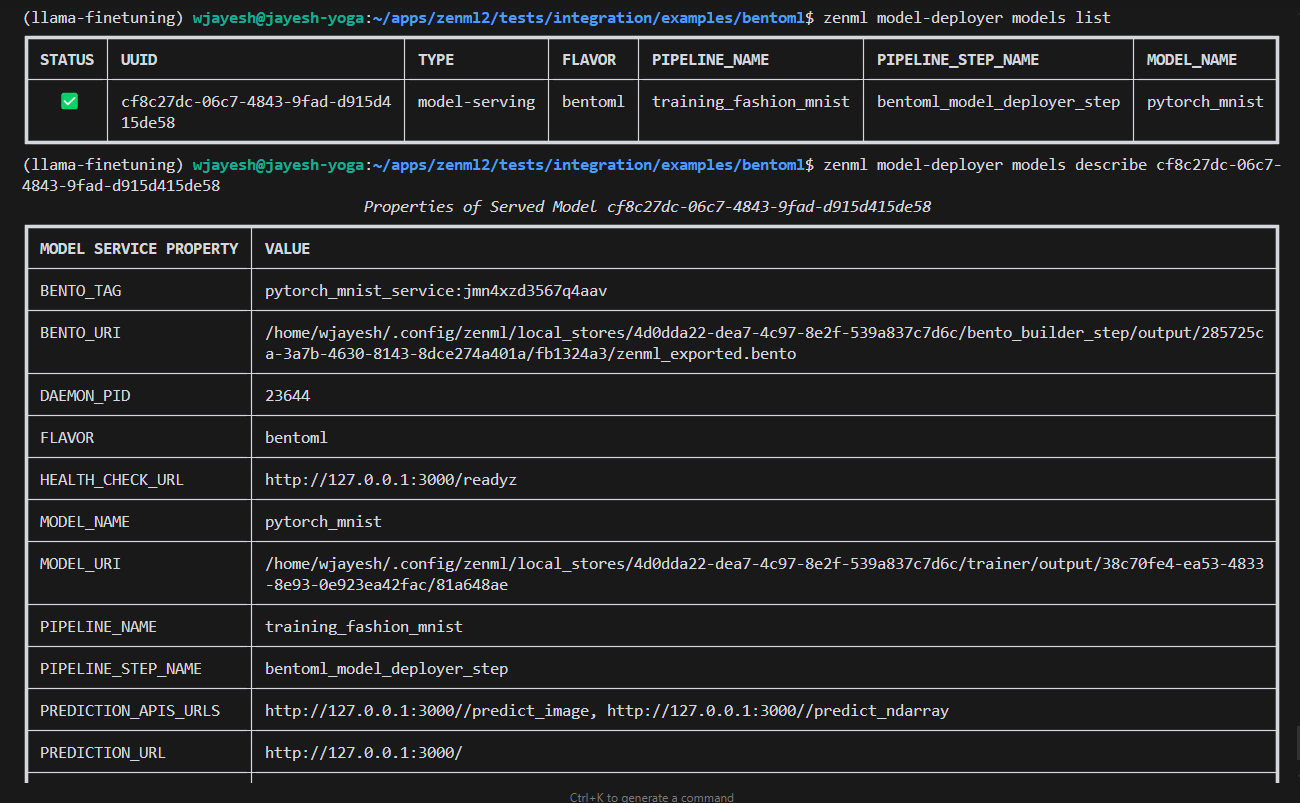
You can now send prediction requests to this model either directly or have a ZenML prediction pipeline that automatically detects what model to use based on the pipeline and step name information.
Building a prediction pipeline
You can design a pipeline like the following
@pipeline()
def inference_fashion_mnist(
    model_name: str, pipeline_name: str, step_name: str
):
    """Perform inference with a model deployed through BentoML.

    Args:
        pipeline_name: The name of the pipeline that deployed the model.
        step_name: The name of the step that deployed the model.
        model_name: The name of the model that was deployed.
    """
    inference_data = inference_loader()
    prediction_service = bentoml_prediction_service_loader(
        model_name=model_name, pipeline_name=pipeline_name, step_name=step_name
    )
    predictor(inference_data=inference_data, service=prediction_service)
where bentoml_prediction_service_loader step is defined to find the right deployed model server based on your pipeline name and step name. This removes a manual step to figure out what model version was deployed by which pipeline and automates the inference part of your workflow.
@step(enable_cache=False)
def bentoml_prediction_service_loader(
    pipeline_name: str, step_name: str, model_name: str
) -> Union[BentoMLLocalDeploymentService, BentoMLContainerDeploymentService]:
    """Get the BentoML prediction service started by the deployment pipeline.

    Args:
        pipeline_name: name of the pipeline_name that deployed the model.
        step_name: the name of the step that deployed the model.
        model_name: the name of the model that was deployed.
    """
    model_deployer = BentoMLModelDeployer.get_active_model_deployer()

    services = model_deployer.find_model_server(
        pipeline_name=pipeline_name,
        pipeline_step_name=step_name,
        model_name=model_name,
    )
    ...

    return services[0]
Conclusion
The integration of ZenML and BentoML offers a powerful solution for streamlining the model deployment process. By leveraging this combination, data scientists and ML engineers can focus more on developing great models and less on the intricacies of deployment. This approach not only saves time but also ensures consistency and reproducibility in the deployment process, ultimately leading to more robust and reliable ML applications in production.
As the field of MLOps continues to evolve, tools like ZenML and BentoML play a crucial role in bridging the gap between model development and production deployment. By adopting these tools and practices, teams can significantly reduce the time and complexity involved in bringing machine learning models from development to production.